Showing posts with label costumes. Show all posts

Tuesday, March 26, 2013

Laura Ingalls came to visit!


For Liberty Girls this semester, we are reading and doing activities based on the book “Little House in the Big Woods” by Laura Ingalls Wilder.

It is such a great book!!!!

Each semester in Liberty Girls we read a historical series or book about a certain time period, and meet twice a month and do activities based on the book(s). I’ve been helping some of the girls by sewing period costumes for them and their 18” dolls each semester as some of the moms of our group don’t sew. (See here and here.)  But this semester I decided I had better not try to sew more than my own daughter’s outfit, and it is turning out rather fun! Each girl is coming up with their own outfits and they are all looking great! We’ll have a family barn dance at the end of April and I’ll take pictures of everyone then and post them here on the blog.


 IMG_8658

Since my daughter’s favorite color is pink, that’s what she wanted her pioneer dress to be! PINK!


 IMG_8659

Pretty cute, don’t you think?


 IMG_8660

The pattern had pantaloons with the dress so I made them. I think they are cute but a little long. :)


 IMG_8662

She loves her American Girl doll!


We were going to read the “Kirsten” series from American Girl dolls this semester, but I have to say, I wasn’t at all impressed with the series. Sure, it has some nice parts to it, but I felt the story line was quite mediocre and there were really no good values being taught. (IMHO, life is too short to spend time reading mediocre books!!!)  So, last minute, right before the semester started, we switched to “Little House in the Big Woods!” You can’t ever go wrong with Little House!!!

However, I did use for the Kirsten doll dress pattern and it can be found here:

http://www.agplaythings.com/AG%20Patterns/DollDressPatterns.html


Linking up with Quilt Story’s Fabric Tuesday

Monday, December 31, 2012

2012 - A Great Year to Start Quilting Again…

So here we go again… ending one year and beginning another.  I’m so glad I started quilting again this year as it’s brought me a lot of joy.

Here’s a collage of a lot of the things I sewed this year…


2012 Sewing Collage

The best thing about sewing and quilting is that, usually, the things you make are for a gift for someone you love. So, the project often evokes a feeling of love for that person when you see it.  What a wonderful hobby!


http://www.portlandmarathon.org/newsletter/jan2012/happy-new-year.jpg

Saturday, September 22, 2012

Fandango!!!

Tonight was our Liberty Girls Family Fandango!!!

Wow! What a night! It was so fabulous! We had delicious food, terrific company, and amazing performers!!!

Don’t our little Josefina dresses look adorable on them!

IMG_7817 

Each of our Liberty Girls moms brought a dish that would have been typical of mid 1800’s New Mexico. We had Carne Adovada (meat marinated in red chile sauce, yum!), refried beans, flour and corn tortillas, Quelites (cooked spinach), Calabacitas (yellow and green squash with corn). For dessert we had hot chocolate and bizcochitos (yummy cookies).

  IMG_7818

And the girls brought their 18” dolls dressed up in their Josefina outfits too! Cute!

IMG_7827

Here’s all the girls waiting for the performance to start.

  IMG_7830

We were then treated by an amazing group of young dancers called “Viva Mexico!” They were SO great! WOW! These kids did such a lovely job doing their dances.  So adorable. And their costumes were beautiful!

IMG_7834

When these girls came out in these lovely skirts, my first thought was “Hmmm… I think I know what my daughter is going to ask me to sew for her after this!” And you know what? She did! She wants a skirt like the pink one on the right. : )

IMG_7837

These dancers were so adorable!

IMG_7842

I need a faster camera to catch the action better!

IMG_7844 IMG_7847 

This picture is of all the dancers and all of our Liberty Girls.

I’m on the left with the teacher of this group. And yes, I made myself a Josefina outfit, too!

What a great evening!!!

 IMG_7850

After it was over, my daughter ran into her room and put on this long circle skirt I had made for last year because it was the closest thing she had to the kind the dancers had. She danced and danced to the music…

IMG_7852 IMG_7853

Yes, she loves to dance and is in dancing lessons. : )

Friday, August 10, 2012

Color Catchers Save the Day!

I sewed four Josefina skirts (one is even for me!) and decided to give them a wash with a Color Catcher to see how much red dye would come out of the fabric… Boy was I in for a surprise!!!

IMG_7504 IMG_7508 a

As you can see, the first washing was really bad, like almost as red as the fabric itself! Then the 2nd washing was a lot less, but I was surprised to see the 3rd and 4th washings look pretty much the same as each other. I could have washed them a fifth time but I was done with washing them.


Thankfully, the Color Catchers worked well enough to keep that cute white eyelet trim White!

IMG_7504


Myra


Friday, August 3, 2012

Josefina is ready!

I finished my daughter’s camisa (shirt) and it sure turned out cute! She had me braid her hair and put flowers on the end of the braid so she’d look just like Josefina does in the book. :)  (Minus the rebozo and sash. I’m working on it!)
IMG_7495   IMG_7496  IMG_7498
Having fun posing!
It’s a cute shirt and it went together rather quickly. Now I’ll be sewing 3-5 more girl outfits and 2-4 more doll outfits.

Besides sewing, it’s also been a busy week of cutting and preparing packages of fabric, etc.,  to go to the moms of our Liberty Girls group, and I think I’ve just about got them done!
IMG_7501
Looking at them piled up in ziplocs like that sure doesn’t look like much, but believe me, it took some time. : )  But it’s all worth it.  I’m really looking forward to the Fandango we’re going to have in September. I’ll be sure to take plenty of pictures and post about it here!

IMG_7493a
One thing about this shirt pattern is that it’s short! Either that or I totally read the pattern piece wrong (which is entirely possible.)  I thought it looked short so I added about 2 1/2” to it and while the finished shirt will tuck into my daughter’s skirt, it comes out easily. I wish I would have cut it about 2"-3” longer. Oh well, live and learn.

Myra
August Finishes

Tuesday, July 24, 2012

Simple Gathered Skirt – Josefina style – a Tutorial

For our Liberty Girls club this semester, we’re going to make costumes for the girls so they can dress up like Josefina.  I will have a pattern for the moms to use for the camisa (shirt) but the skirt is just a simple gathered skirt that I don’t feel we need to buy patterns for, so I thought I’d make this tutorial for the moms in our group who would appreciate instructions on how to make one.

This is my first tutorial and I took at least a thousand pictures! ; ) We’ll see how many I end up using… And please, if you feel that I didn’t describe something well, please let me know and I’ll fix it! Thanks!

This is what the finished skirt will look like. Cute, isn’t it?

IMG_7481

Before we begin:

** I’ll use my daughter’s measurements as an example. You will need to plug in your daughter’s measurements for her skirt.**

Measure your daughter from her waist to the floor.  My daughter’s measurement was 27.5”

Take that number, and subtract 5'”. So, my new measurement is 22.5”

Add 1.25” for the casing, and Add 1” for the hem. So, my final measurement is 24.75”.

Supplies:

  • 2 Widths of Fabric (WOF) x your final measurement.  (Mine was 2 WOF x 24.75”)
  • 1/4” - 1/2” elastic the length of the width of your daughter’s waist. (Mine was 21”)
  • 88” of 1 1/4” – 1 5/8” white eyelet trim
  • red and white thread
  • 2 safety pins for use with elastic


Instructions:

IMG_7434

This shows me getting ready to cut one width of fabric at 24.75” in length. Cut two of these.

 IMG_7436

Open up your two pieces of fabric and put right sides together, pin the selvages together on one side and… IMG_7440

…sew a seam 1/4” inside of the inside edge of the white selvage. (1/4” is usually at the edge of your pressure foot.)


IMG_7442

You can cut off some of the white if you want to.

IMG_7443             Iron your seams.


IMG_7444On one of the raw edges, fold over 1/4” and sew.

IMG_7445

At this point I would recommend sewing down both sides of your seams a couple of inches. This will just make things easier for you when it comes time to put the elastic in the casing.

IMG_7448Then on that same edge, fold over 1” and sew, this time leaving an open space about 2” wide.


IMG_7449 This is showing the opening in the casing.

      IMG_7451Next, cut a piece of elastic the length of the width of your daughter’s waist.


IMG_7452
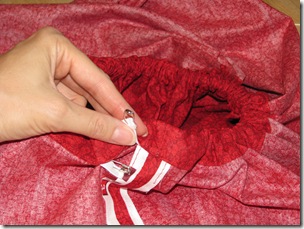
Put a safety pin in one end of the elastic…
IMG_7454
…and begin inserting it into the casing.


IMG_7456

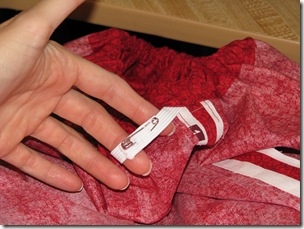
At this point I would encourage you to pin the other end to the skirt near the casing opening. Once upon a time I didn’t do this step and ended up pulling the end all the way inside the casing… : )
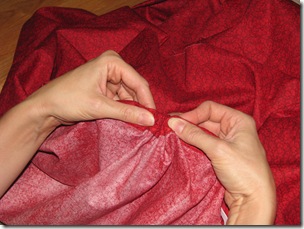
 

IMG_7455
Slide the safety pin through the casing…
IMG_7457
…until it comes out of the opening again.


IMG_7461
Pin the two ends together, overlapping about 1”.
IMG_7462
Then have your daughter try it on. Adjust elastic length as necessary.


IMG_7463
Sew ends of elastic together, overlapping 3/4” – 1”
using a zig zag stitch.
IMG_7466
                         Then sew the opening shut.


IMG_7467
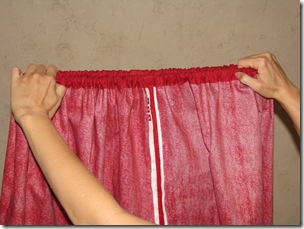
Stretch the waistband from edge to edge…
IMG_7468
…then move your hands half way around the skirt and stretch again. This will help the gathers even out.

        IMG_7470At this point I would sew through the elastic on the two side seams. This helps keep half of the gathers in front, and half of the gathers in back.

 IMG_7472

Now on the bottom edge of the skirt, you can do the hem one of two ways. One way is to fold over 1/2” and sew all the way around, and then fold over another 1/2” and sew all the way around again.  This is just fine.


IMG_7473
Or you can fold over 1/2”…
IMG_7474
…and fold over another 1/2” and sew all the way around. This just saves you from having to go around twice.

   IMG_7477

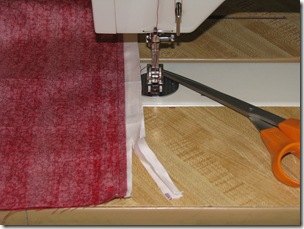
Now switch your thread color to white. (If I would have thought of it, I would have done this step first before switching to red thread in the first place! Do this step whenever you want.)  Fold over 1/4” and sew on the end of your eyelet on both ends. Make sure you do both ends the same way!


IMG_7478
With red thread, sew the right side of the eyelet
to the wrong side of the skirt hem.
IMG_7479
       Overlap the eyelet at the end.


IMG_7481 

Now you have an adorable little skirt!!! So fun! The minute I showed my daughter that it was finished, she had to put it on and has been wearing it the whole day.  Some girls sure love to dress up! 

I hope you enjoyed this tutorial. (I only used 30 out of my 1000 pictures! : )  Again, if you feel I need to clarify something please let me know!!

Thanks!

Myra

PS I’m linking up with Such a Sew and Sew, Quilt Story, and Freshly Pieced. (Even though this is a finished product, I still consider it a WIP since I still have so many more to do! ) And with Confessions of a Fabric Addict. Whoop! Whoop!

Related Posts Plugin for WordPress, Blogger...